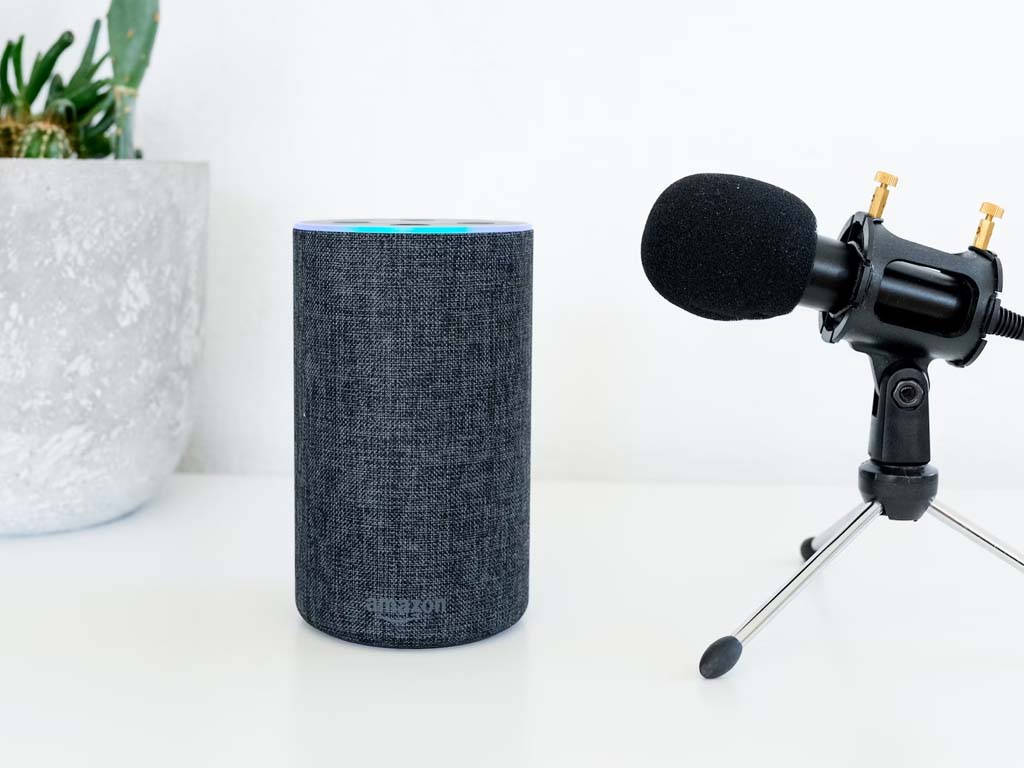
In the past few years, voice assistants have become a cornerstone of modern smart homes. Devices like Amazon Alexa, Google Assistant, and Apple Siri enable hands-free control of your home, making everyday tasks more convenient and efficient. Whether it’s controlling your lights, adjusting the thermostat, or even ordering groceries, voice assistants offer an easy way to interact with your smart home devices.
But how exactly can you integrate these voice assistants into your smart home setup? In this blog post, we’ll walk you through the step-by-step process of integrating voice assistants into your home, the benefits they bring, and some tips for getting the most out of this technology.
1. Choose the Right Voice Assistant for Your Smart Home
Why You Need It:
The first step in creating a voice-controlled smart home is selecting the right voice assistant. There are three major players in the market: Amazon Alexa, Google Assistant, and Apple Siri. Each has its strengths, so it’s important to choose one that fits with the devices and systems in your home.
– Amazon Alexa: Known for its compatibility with a wide range of smart devices, Alexa can control everything from lights and thermostats to security cameras and entertainment systems. It’s available on a range of Amazon Echo devices, like the Echo Dot or Echo Show.
– Google Assistant: If you’re already invested in the Google ecosystem (Google Nest, Google Home, or Android devices), Google Assistant might be your best bet. It’s known for its strong search capabilities and integration with Google apps.
– Apple Siri: If you’re an Apple user, Siri is a great choice. It integrates seamlessly with HomeKit-enabled devices and is ideal for those who prefer the Apple ecosystem and want voice control across their iPhones, iPads, and MacBooks.
Key Benefits of Choosing the Right Assistant:
– Compatibility: Ensure that the voice assistant works with the devices you want to control.
– Ecosystem Integration: Your choice of assistant should complement your existing smart home devices.
– Personal Preference: Some users may prefer Google Assistant for its search capabilities, while others may prefer Alexa or Siri for their deep integration into their home automation systems.
2. Set Up Your Voice Assistant Device
Why You Need It:
Once you’ve selected your voice assistant, the next step is setting up the device. Depending on which voice assistant you’ve chosen, you’ll need to purchase a compatible device, such as an Amazon Echo, Google Nest Hub, or Apple HomePod.
Amazon Alexa Setup:
1. Plug in your Alexa-enabled device (e.g., Echo Dot, Echo Show).
2. Download the Amazon Alexa app on your smartphone.
3. Open the app and follow the on-screen instructions to connect your device to your Wi-Fi network.
4. Once connected, Alexa will guide you through additional setup, including linking any compatible smart home devices.
Google Assistant Setup:
1. Plug in your Google Nest speaker or display (e.g., Google Nest Mini, Google Nest Hub).
2. Download the Google Home app from the App Store or Google Play Store.
3. Follow the in-app instructions to connect your Google Assistant device to your Wi-Fi network.
4. Once connected, you’ll be prompted to link your Google account and add compatible smart devices.
Apple Siri Setup:
1. For Siri, you don’t need a dedicated device; you can use an Apple HomePod, iPhone, or iPad as your central Siri device.
2. For a more integrated smart home, download the Apple Home app on your iPhone or iPad.
3. Ensure your HomeKit-compatible smart devices are properly set up in the Home app.
4. You can start using Siri for voice commands once everything is connected.
Key Benefits:
– Easy setup with intuitive apps and instructions.
– Seamless connection to Wi-Fi for remote control.
– Step-by-step guides help with device and network integration.
3. Integrate Smart Home Devices with Your Voice Assistant
Why You Need It:
Once your voice assistant is set up, it’s time to start adding your smart home devices, such as lights, thermostats, security cameras, and more. Many popular smart home brands are compatible with voice assistants, but make sure to check for compatibility before purchasing new devices.
Amazon Alexa-Compatible Devices:
– Smart Lights: Philips Hue, LIFX, and TP-Link Kasa.
– Smart Thermostats: Nest, Ecobee, and Honeywell.
– Smart Plugs: TP-Link, Kasa, and Wemo.
– Security Cameras: Ring, Arlo, and Blink.
– Smart Locks: August, Schlage, and Yale.
Google Assistant-Compatible Devices:
– Smart Lights: LIFX, Philips Hue, and TP-Link Kasa.
– Smart Thermostats: Nest, Ecobee, and Honeywell.
– Smart Plugs: Kasa, TP-Link, and Wemo.
– Security Cameras: Nest, Ring, and Arlo.
– Smart Locks: August, Schlage, and Kwikset.
Apple Siri-Compatible Devices:
– Smart Lights: Philips Hue, LIFX, and Nanoleaf.
– Smart Thermostats: Ecobee and Honeywell.
– Smart Plugs: iDevices and Wemo.
– Security Cameras: Logitech Circle View and EufyCam.
– Smart Locks: August, Schlage, and Yale.
How to Integrate Devices:
1. Ensure each device is connected to your home Wi-Fi network.
2. For Alexa and Google Assistant, download the corresponding apps (Amazon Alexa or Google Home) and use them to “discover” new devices.
3. For Siri, add devices to the Apple Home app and assign them to rooms.
4. Once connected, you can control your devices using voice commands like, “Alexa, turn off the living room lights,” or “Hey Google, set the thermostat to 72°F.”
Key Benefits:
– Quick and simple integration with voice assistants.
– Control multiple devices with a single voice command.
– Compatibility with popular smart home brands ensures a wide range of options.
4. Set Up Routines and Automations
Why You Need It:
Once your devices are integrated, it’s time to automate your smart home with routines and schedules. This is where the magic happens—automating tasks and controlling multiple devices with a single voice command. You can set up morning routines, bedtime routines, or even automate specific devices based on the time of day, your location, or your habits.
Amazon Alexa Routines:
– Open the Alexa app and go to the “More” menu.
– Tap Routines and select “Create Routine.”
– Choose a trigger (e.g., a specific time, voice command, or device action).
– Add actions, such as adjusting the thermostat, turning on lights, or playing music.
Google Assistant Routines:
– Open the Google Home app and tap on Routines.
– Tap Add a Routine and set a trigger (e.g., a voice command, specific time).
– Select the actions you want (e.g., “Good morning” could turn on your lights, adjust the thermostat, and tell you the weather).
Apple Siri Automations:
– Open the Apple Home app and tap the Automation tab.
– Choose when you want the automation to trigger (e.g., when you arrive home, when you leave, or at a specific time).
– Select the devices and actions you want to control with Siri, such as turning on lights or adjusting the thermostat.
Key Benefits:
– Automate daily tasks and routines to save time.
– Voice-controlled actions that streamline your home management.
– Create personalized experiences for different times of day.
5. Use Voice Commands for Convenience and Control
Why You Need It:
Now that your devices are connected and routines are set up, you can use voice commands to control everything in your home. Voice assistants allow you to do more than just turn on lights—they can adjust your thermostat, control your entertainment system, and even interact with your home security system.
Examples of Voice Commands:
– “Alexa, dim the lights to 50%.”
– “Hey Google, set the thermostat to 68 degrees.”
– “Siri, lock the front door.”
– “Alexa, show me the front door camera.”
Key Benefits:
– Hands-free convenience and control over your home.
– Quick access to various smart home functions without needing your phone or app.
– Streamlined interaction with entertainment and security systems.
6. Maintain and Update Your Smart Home Setup
Why You Need It:
A smart home setup is an ongoing process. You’ll want to periodically update the firmware on your voice assistant and smart devices to ensure they function smoothly and securely. Additionally, it’s important to keep your devices organized, especially as you add new devices to your smart home system.
Tips for Maintenance:
– Update Firmware: Regularly check for software updates on your voice assistant and smart home devices to ensure compatibility and security.
– Organize Devices: Use the app to group devices by room, creating a logical and easy-to-manage setup.
– Add More Devices: As your budget allows, consider expanding your smart home by adding new devices, such as smart locks, security cameras, and automated blinds.
Key Benefits:
– Ensures the long-term functionality of your smart home.
– Keeps your system secure with the latest updates.
– Makes it easier to control and manage your devices.
Conclusion
Integrating voice assistants into your smart home brings a whole new level of convenience, security, and energy efficiency. By following the steps outlined in this guide—choosing the right assistant, setting up devices, and automating routines—you’ll have a fully integrated voice-controlled home in no time. Whether you opt for Alexa, Google Assistant, or Siri, these voice assistants will help you streamline your home’s operation and make everyday tasks easier and more enjoyable.
The key is to start small and build your smart home over time. Begin with essential devices like smart lights, plugs, and thermostats, and gradually expand your setup as your needs grow. With voice assistants at the center of your smart home, you’ll enjoy hands-free control, better organization, and a truly modern living experience.